Custom BMW K100 Build: 10 Stages From Donor to Finished Bike
A custom BMW K100 build, taken from a tired but well-loved blue donor bike found in the local paper, stripped, redesigned and built into a one off custom motorcycle. Here are the 10 stages we work through on the bench when building a custom bike from a K100, or any decent donor of that era, from sourcing to first ride.
The donor for this one was a well serviced, fully loaded, pre-loved blue BMW K100, found and purchased locally. Love the small ads in the local papers, that is still where the honest bikes turn up, the ones that have been ridden and maintained rather than flipped. A good donor is half the battle on any custom BMW K100 build, and this one had clearly been someone's pride for a long time before it came in.
What follows is the 10 stage process we use on the bench for designing and building a one off custom motorcycle. The same approach works for a K100 cafe racer, a brat, a bobber, or whatever direction you take the bike. Stages in order, no skipping.
The 10 stages of a custom BMW K100 build
Stage 1. Do your research before you commit
Find out what is hot on the market right now. Bobbers, cafe racers, choppers, high capacity bikes, 125cc commuters, the custom motorcycle market fluctuates all the time. The style you pick affects everything downstream, the donor you want, the parts you can sell off, the buyer at the end of it if you are building to sell. Get this bit right before you spend a penny.
Stage 2. Find and buy a good donor bike
There is no point buying a donor bike with major wiring issues or serious mechanical gremlins. Buying good now will save you time and effort later in the build, and ten times the money on parts. A BMW K100 in honest mechanical condition is the right starting point for a custom K100 cafe racer or brat build, and they are still findable if you are patient.
Stage 3. Service the donor properly first
Service the donor bike properly and get everything working, as far as possible, while it is still in its original clothes. This bit is critical. Diagnosing and fixing issues is so much quicker when everything is on the bike and connected the way the factory intended. Charging system, fuelling, electrics, brakes, all of it. Get a known good baseline before you take a single bolt out.
Stage 4. Strip the bike, do not rip it apart
Try not to rip the thing to pieces. Remember there is always money to be made selling bike parts on eBay, and the K100 has a strong parts market. On this build I sold all the plastics including fairings, the seats, the luggage, suspension parts. I made almost more money selling on parts than I paid for the whole bike, essentially getting the donor for nothing.
Bag and tag what you are keeping. Photograph everything before it comes off. Make space for storage. None of this is glamorous but a custom build that stalls because of missing parts is a build that does not finish.
Stage 5. Step back and design (with CAD)
Now the fun begins. Step back, look at the bare bike, and let your imagination run. I always start with a fuel tank. Lay it in place on the frame, adjust the height to suit what you envisage, then build a mock tail unit and subframe and try various positions until you get something you are happy with.
I use CAD a lot during this process. Not Computer Aided Design, Cardboard Aided Design. It is cheap, it is flexible, and it is the fastest way to get the shape and size of the parts I will later fabricate in steel. Cardboard mock-ups have saved me more time on custom motorcycle builds than any other tool in the workshop.
The bike tells you what it wants to be. Your job is to listen before you start cutting steel.
Stage 6. Custom fabrication and fitting
This is where your skill as a fabricator gets tested. Welding, drilling, mounting, finishing. Forward planning is essential here. Always think about where your essential components are going, the battery, the wiring, the electronics, the indicators, the numberplate mounting. All of this matters if your custom BMW K100 is going to be ridden legally on UK roads, and there is no getting around it later without redoing work.
Stage 7. Finalising the custom components
Finishing the custom components to a high standard at this stage will make all the difference when you get to paint. This stage is time consuming, so do not rush it. I find I am fitting and removing and refitting custom parts a lot during this phase, just to get everything dialled in perfectly. A panel that is 2mm off looks fine in primer and obvious in gloss black, every time.
Stage 8. Custom paint work
I have always got an idea of what I am going to do for the custom paint work by this stage, but I have two teenagers in the house whose opinion is always forthcoming whether I want it or not. So I do encourage another opinion on custom paint schemes. It always re-energises my imagination and throws up new ideas.
Be open to suggestions. It is easy to change your mind now, before you start the painting process, than after you have spent a week painting your custom components and changed your mind. You do not want an "I told you so, Dad" when the bike is finished and fitted.
Stage 9. Pre-paint fit-up and wiring
Add your custom parts and bought-in parts to the bike before fitting your freshly painted pieces. Get all your wiring sorted, keep it neat and tucked away, check and re-check that everything works. The bike should be 85% completed by this stage. Brakes, wheels, lights, exhaust system, dashboard, all finished and working correctly. Do not rush this stage, take your time, get it right first time.
Stage 10. Fit the painted parts and ride
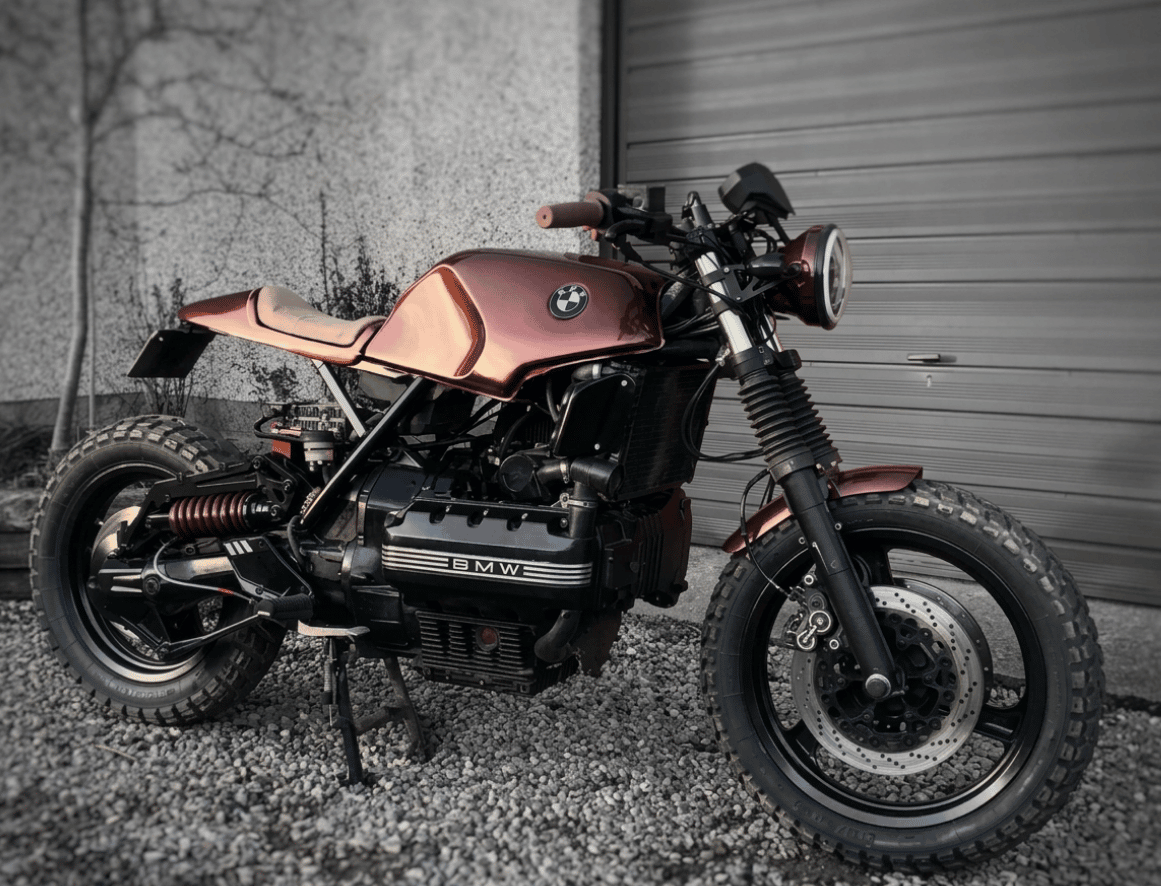
Fit all the beautifully painted custom parts. Hook up the fuel system, bolt the seat unit in place, and stand back and admire your creation. It is an amazing feeling, building something from your imagination and standing back looking at it in all its real life glory.
As a rule, if I am building a custom motorcycle for a client, I will ride the bike for around 100 miles before it leaves my workshop. Just to iron out anything I am unhappy with. That is just how I work, and it has saved me and the customer a phone call more than once.
Thinking about a custom BMW K100 build?
If you have a K100 sitting in the garage, or you are looking for the right donor to start a build, get in touch. Happy to talk through styles, what the donor needs to have, realistic budgets and timescales, and what a proper one off custom motorcycle from the workshop actually involves. See more of our custom builds here, or drop us a line at the workshop.